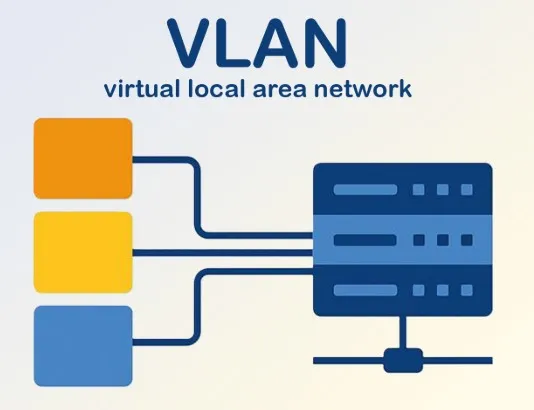
Most homelabs start with a single flat network. Every device — servers, desktops, phones, smart TVs, IoT gadgets — sits on the same subnet. That setup is fine for small labs, but it becomes a problem the moment you add sensitive services, guest devices, or smart-home gear that phones home to unknown endpoints. Home network segmentation fixes this by splitting one flat LAN into isolated zones using VLANs, DNS controls, and a router that understands the difference between trusted and untrusted traffic.
Why a Flat Network Stops Working
On a flat network, every device can reach every other device. A compromised smart bulb can scan your NAS. A laptop infected from a download can reach your Proxmox host. Guest Wi-Fi users can see your internal DNS queries. None of this is hypothetical; it is the default behavior of most consumer routers.
Segmentation limits blast radius. If a device in the IoT VLAN is compromised, it cannot directly talk to your backup server or your personal machines. That buys you time to detect and contain the problem before it spreads.
What You Need
- A router that supports VLANs and inter-VLAN routing
- A managed switch with VLAN support
- Pi-hole or similar DNS sinkhole for ad blocking and DNS logging
- Optional: firewall rules between VLANs
For a homelab, the most common choices are OPNsense, pfSense, or a Linux router with Firecracker microVMs. If you already run Proxmox, OPNsense as a VM with PCI passthrough or virtualized NICs is a clean path.
VLAN Design
Start with a simple segmentation plan. Four VLANs cover most homelabs:
- VLAN 10 — Management: Proxmox hosts, switches, routers, IPMI/BMC
- VLAN 20 — Trusted/Clients: Desktops, laptops, phones
- VLAN 30 — IoT/Untrusted: Smart bulbs, cameras, thermostats, TVs
- VLAN 40 — Guest: Visitor Wi-Fi, isolated from everything else
Each VLAN gets its own subnet. Keep them small enough to manage but large enough for growth:
- VLAN 10: 10.0.10.0/24
- VLAN 20: 10.0.20.0/24
- VLAN 30: 10.0.30.0/24
- VLAN 40: 10.0.40.0/24
Switch Configuration
On your managed switch, create the VLANs and tag the ports that connect to the router and to other switches. Access ports on the switch should be untagged for the VLAN that device belongs to.
Example: the port connecting to your router trunk port carries all four VLANs tagged. The port connecting to a smart TV is untagged VLAN 30. The port connecting to your Proxmox server is untagged VLAN 10.
Router Configuration
In OPNsense or pfSense, create interfaces for each VLAN and assign them IPs:
- VLAN 10: 10.0.10.1/24
- VLAN 20: 10.0.20.1/24
- VLAN 30: 10.0.30.1/24
- VLAN 40: 10.0.40.1/24
Enable DHCP on each interface, or use static IPs for servers and critical devices. The router becomes the default gateway for every VLAN.
Inter-VLAN Routing and Firewall Rules
By default, the router routes between all VLANs. That is convenient but dangerous. Add firewall rules to restrict traffic:
- VLAN 40 (Guest) can reach the internet but not any other VLAN
- VLAN 30 (IoT) can reach the internet but not VLAN 10 or VLAN 20
- VLAN 20 (Trusted) can reach VLAN 10 and the internet, but not VLAN 30 or VLAN 40 unless needed
- VLAN 10 (Management) is the most restricted; only admin machines should reach it
Stateful rules make this easier. Allow established and related traffic, then block new connections from sensitive VLANs toward the rest of the network.
DNS with Pi-hole
Deploy Pi-hole on VLAN 10 and make it the DNS server for every other VLAN. That gives you centralized ad blocking, query logging, and the ability to block suspicious domains from IoT devices.
You can also split DNS. Internal hostnames resolve via Pi-hole, while external queries go to upstream resolvers like Cloudflare or Quad9. For sensitive VLANs, consider DoH or DoT upstreams.
Wireless Segmentation
If your access point supports multiple SSIDs, map them to VLANs:
- Home Wi-Fi → VLAN 20
- IoT Wi-Fi → VLAN 30
- Guest Wi-Fi → VLAN 40
Do not reuse Wi-Fi passwords across VLANs. If a guest device is compromised, the attacker should not be able to guess your personal Wi-Fi password and jump VLANs.
Verification and Testing
After building the network, test it before declaring victory. From a device in VLAN 30, try to ping a server in VLAN 10. From VLAN 40, try to reach a NAS in VLAN 20. Every blocked attempt is a working rule. Every unexpected success is a gap that needs closing.
Tools like nmap and traceroute help verify that segmentation actually holds. Run them from each VLAN to confirm routing behavior.
Final Thoughts
Home network segmentation does not have to be enterprise-grade to be effective. Four VLANs, a managed switch, and a firewall with a few dozen rules already put you ahead of most consumer networks. The goal is not perfect isolation; it is making compromise harder and containment automatic.
Start with VLAN 30 for IoT and VLAN 40 for guest Wi-Fi. Add management segmentation once you are comfortable with the router and switch. Over time, you can refine rules, add monitoring, and expand the model as your homelab grows.