How to Use Proxmox and Install OwnCloud on a Personal Server
Introduction
In today’s digital world, self-hosting has become increasingly popular. Whether you want to regain control over your data, avoid third-party cloud services, or simply experiment with new technologies, building your own cloud server is a rewarding project. Two tools stand out for this purpose: Proxmox VE, a robust virtualization platform, and OwnCloud, a self-hosted cloud storage solution.
By combining the power of Proxmox and OwnCloud, you can create a secure, private, and highly customizable cloud server right in your home or office. This guide will explain what Proxmox and OwnCloud are, why they work so well together, and provide a step-by-step approach to setting up your Proxmox OwnCloud server.
What is Proxmox VE?
Proxmox Virtual Environment (Proxmox VE) is an open-source virtualization management platform. It allows you to create and manage virtual machines (VMs) and containers using an intuitive web interface. Proxmox integrates KVM for full virtualization and LXC for lightweight containers, making it a flexible choice for home labs and enterprise use.
Key Features of Proxmox VE:
- Web-based management console
- Support for both VMs and containers
- ZFS support and storage management
- High-availability clustering
- Backup and restore features
For personal use, Proxmox is ideal because it lets you run multiple operating systems or services on one physical machine. Instead of dedicating an entire server to a single task, you can run multiple workloads side by side.
What is OwnCloud?
OwnCloud is an open-source platform that provides cloud storage functionality similar to Dropbox, Google Drive, or OneDrive—but under your control. With OwnCloud, you can:
- Store and sync files across devices
- Share documents securely
- Integrate with calendars, contacts, and third-party apps
- Use encryption for better privacy
The biggest advantage of OwnCloud is data ownership. Your files remain on your own server, not in the hands of a third-party provider.
Why Use Proxmox and OwnCloud Together?
By deploying OwnCloud inside Proxmox, you get the best of both worlds:
- Isolation and Flexibility: OwnCloud runs inside its own VM or container, isolated from other services.
- Easy Resource Management: Proxmox makes it simple to allocate CPU, memory, and storage resources to your OwnCloud instance.
- Scalability: You can start small and expand later by adding more VMs or storage nodes.
- Backups and Snapshots: Proxmox allows you to create snapshots of your OwnCloud VM, making backup and disaster recovery simple.
- Learning Opportunity: For tech enthusiasts, running both Proxmox and OwnCloud is a great way to understand virtualization and cloud hosting.
Preparing Your Personal Server
Before installing, ensure you have:
- A dedicated server or powerful PC with at least 8 GB RAM and multi-core CPU
- A reliable internet connection
- A Proxmox VE installation USB stick
- A separate storage disk (recommended for OwnCloud data)
Step 1: Installing Proxmox VE
- Download Proxmox VE ISO: Get the latest ISO from the official Proxmox website.
- Boot and Install: Use a bootable USB drive to install Proxmox VE on your server hardware.
- Basic Setup: During installation, configure your hostname, network settings, and storage partitions.
- Access Web Interface: After installation, open a browser and navigate to:
https://your-server-ip:8006Login using the root account created during installation.
At this point, Proxmox is ready to host your virtual machines.
Step 2: Creating a VM for OwnCloud
- Log into Proxmox Web Interface.
- Create a New VM: Click “Create VM” and choose your settings.
- OS: Select Ubuntu Server or Debian (recommended for OwnCloud).
- CPU: At least 2 cores.
- Memory: 4 GB minimum.
- Disk: 50–100 GB for testing, expandable later.
- Install the OS: Upload or select your chosen ISO, then install the operating system.
- Network Configuration: Assign a static IP address to ensure your OwnCloud is always reachable.
Step 3: Installing OwnCloud
Once your VM is running, connect via SSH or Proxmox console.
Install Required Packages
sudo apt update && sudo apt upgrade -y
sudo apt install apache2 mariadb-server libapache2-mod-php php php-mysql php-xml php-mbstring unzip wget -y
Download and Extract OwnCloud
wget https://download.owncloud.org/community/owncloud-latest.zip
unzip owncloud-latest.zip
sudo mv owncloud /var/www/html/
Configure Permissions
sudo chown -R www-data:www-data /var/www/html/owncloud
sudo chmod -R 755 /var/www/html/owncloud
Configure Database
sudo mysql -u root -p
Inside MySQL shell:
CREATE DATABASE owncloud;
CREATE USER 'ownclouduser'@'localhost' IDENTIFIED BY 'yourpassword';
GRANT ALL PRIVILEGES ON owncloud.* TO 'ownclouduser'@'localhost';
FLUSH PRIVILEGES;
EXIT;
Configure Apache
sudo nano /etc/apache2/sites-available/owncloud.conf
Add the following:
<VirtualHost *:80>
    ServerAdmin admin@example.com
    DocumentRoot /var/www/html/owncloud
    ServerName your-domain.com

    <Directory /var/www/html/owncloud>
        Options +FollowSymlinks
        AllowOverride All
        Require all granted
    </Directory>

    ErrorLog ${APACHE_LOG_DIR}/owncloud_error.log
    CustomLog ${APACHE_LOG_DIR}/owncloud_access.log combined
</VirtualHost>
Enable site and modules:
sudo a2ensite owncloud.conf
sudo a2enmod rewrite
sudo systemctl restart apache2
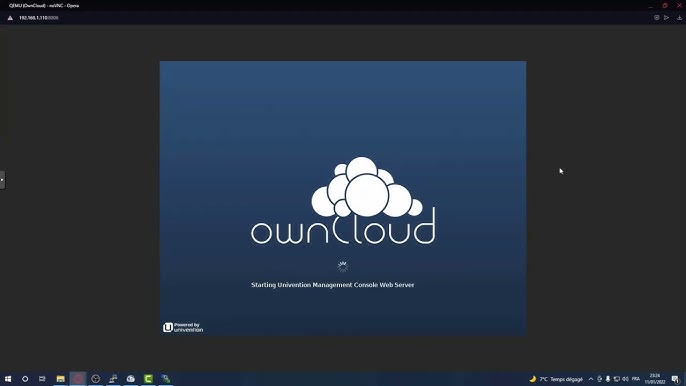
Step 4: Accessing OwnCloud
Open a web browser and go to:
http://your-server-ip/owncloud
Follow the setup wizard:
- Create an admin account
- Enter the database credentials you configured earlier
- Finish the installation
Congratulations—you now have a running Proxmox OwnCloud server!
Step 5: Securing Your Server
- Enable HTTPS using Let’s Encrypt:
sudo apt install certbot python3-certbot-apache -y
sudo certbot --apache -d your-domain.com
- Firewall Setup:
sudo ufw allow 22
sudo ufw allow 80
sudo ufw allow 443
sudo ufw enable
- Regular Updates:
Keep your Proxmox and VM packages updated to protect against vulnerabilities.
Benefits of Running Proxmox + OwnCloud
- Data Privacy: Your files remain under your control.
- Cost Savings: No subscription fees like Dropbox or Google Drive.
- Customizability: Add apps and plugins to extend OwnCloud’s functionality.
- Learning Value: Gain real-world experience in server management, virtualization, and security.
- Scalability: Expand storage or run multiple instances easily within Proxmox.